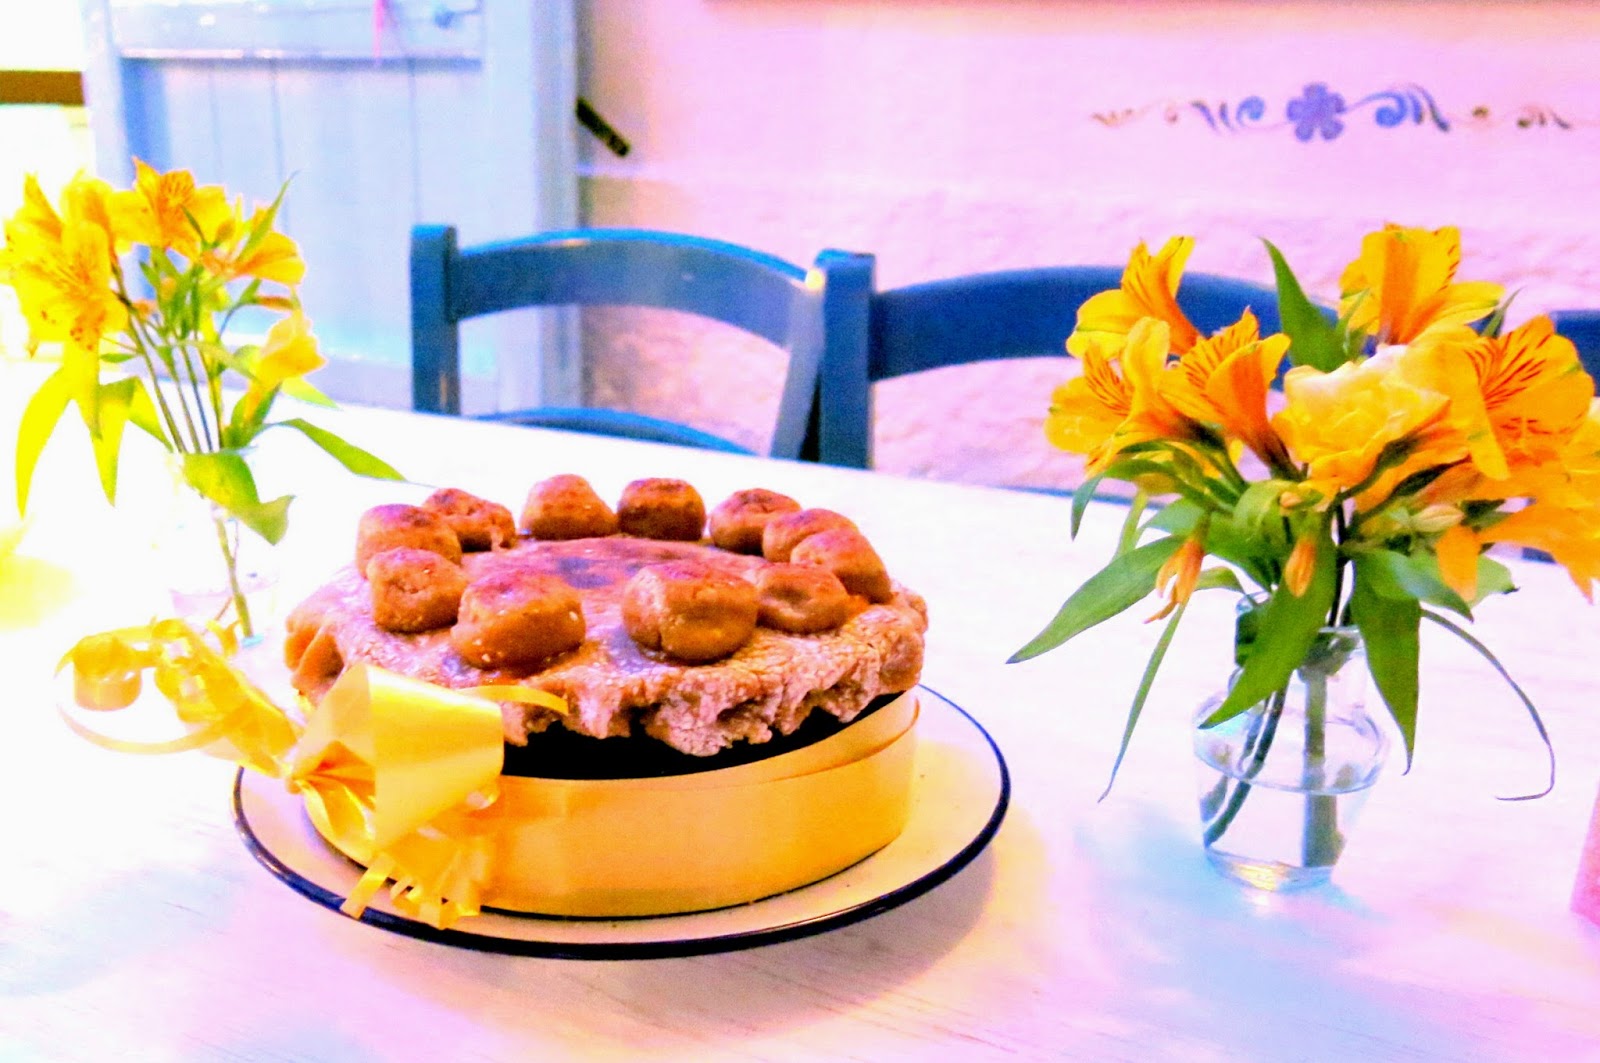
Sunday, June 8, 2014

Strawberry Rum. A summer after dinner shot or a curious cocktail


Summer is here, the trees and gardens are groaning with fruit.  Are you fed up with making jam and chutney, I am?  Then try this amazing and easy to make brew.


In my local supermarket in Ibiza the price of strawberries is staggeringly little!  €1.50 for 500g of strawberries and 37.5% ABV, cheap white rum is coming in at just €9.50 per litre.  It would be rude not to put them to good use!

Ingredients

·         1kg Strawberries (You can even use overripe, but not mouldy ones)

·         1kg granulated sugar

·         1.5l cheap white rum

Method

·         Remove the ‘hulls’ and cut the strawberries into halves, smaller for big berries.  Don’t worry about a bit of dust on the fruit.  The alcohol will kill any bugs and it will settle to the bottom and be decanted out when you the finish making the product

·         Put the cut fruit into a large preserving jar as in the photograph

·         Pour in the sugar

·         Pour in the rum

·         Shake well, immediately and then intermittently until the sugar dissolves in the rum/fruit juice mixture.

·         Put the jar in a cool dark cupboard

·         Shake the jar daily for a week

·         After a week, leave the jar alone for a month or so, longer if you have the patience. The fruit will gradually settle to the bottom of the jar.

·         When you are happy that no more flavour can be extracted, strain the fruit from the rum.

·         Finally return the strained rum into a clean, second, preserving jar.  Add the whipped up whites of two eggs to the part finished rum, stir well and watch as bits of fruit pulp and “stuff” flocculates (settles) to the bottom of the jar.

·         Allow the settling process to continue for about a week, or until the rum above is brilliantly clear.

·         Carefully decant the clear rum into clean jugs without disturbing the “goo,” in winemakers speak these are called the ‘lees,’ on the jar bottom.

·         Finally bottle the finished rum in clean, clear, used white wine bottles and seal them with plastic ‘corks.’

·         Label and date the bottles.

·         Put one in the fridge ready to drink, store others on their sides in a wine rack.

Drinking

·         Either

·         Any time - Drink iced as a shot after dinner

·         Summer - Pour over ice, add a good sprig of mint, a slice of orange and mix 50:50 with soda water or fizzy lemonade.

NB‘s

·         More lees will appear, try to pour drinks without disturbing them, they’ll do you no harm – it just doesn’t look good to serve a cloudy drink (Unless of course it is bottled Worthington’s White Label IPA!)

·         You can use many different kinds of fruit to make similar brews.  Limoncello is made from lemons in a similar way (use the zest and the juice, not the pith) and works very well.  Apricots are good too, although the flavour is more delicate.

·         I’ve tried to reuse the strawberries filtered from the jar, but find that they have little or no flavour.

·         The decanted lees, both first and second pouring, can be saved and used when/if a cake mix calls for booze to be added!

Saturday, June 7, 2014

Fruit cake. A British tea time treat


Mandy’s never fail, boiled fruit cake

Oh and before you think I’ve gone even more ‘Ga Ga’ its the fruit that gets boiled, not the cake!
Earlier this year I had the good fortune to stay at Laskill Country House (www.laskillcountryhouse.co.uk) near Hawnby in North Yorkshire. If ever you’re travelling on the Yorkshire Moors treat yourself to B & B with Mandy, the chef patronne, her hospitality is legendary.  The place is tucked away off the B1257 in Bilsdale (yes there is such a place,) about five miles north of Helmsley, not far from Ampleforth Abbey and school, in God’s own country and truly beautiful.   
Having arrived late after a full and busy day, what a lovely surprise it was to find a little box, beside the tea and coffee kit in my room, that had a generous chunk of this cake inside.  Not exactly the ideal food to go to bed on but I was shattered and it really touched the spot.   If you ask nicely Mandy will even give you 'seconds!'
Since then I’ve left some out for the houseguests coming stay to my apartment at “El Observatorio” and they love it.  I find that it gets things off to a brilliant start.  Well worth trying as a welcome, if you let your place out to summer visitors.

Ingredients

·         750gm Sultanas

·         2 teaspoons mixed spice

·         2 teaspoons ground dried ginger

·         2 teaspoons baking powder

·         1 generous pinch salt

·         1 generous tablespoon glycerine (from good pharmacies)

·         3 eggs beaten

·         250gm butter

·         280gm plain flour

·         250gm granulated sugar (Demerara if you want a brown looking result)

·         1 tablespoon Demerara sugar

·         250ml water*

*I used the settled dregs from some homemade Hierbas, our local Ibicenco liqueur, one time, instead of water.  It added a tiny hint of aniseed to the finished cake. Brilliant!!


Method
  • Set the oven to 160 C

·         Line a well oiled rectangular 21cm cake tin with baking parchment

·         First put the dried fruit, butter, sugar, spices together with the water (or booze – be careful though, if you use full strength liquor it could burst into flames, dilute it 50:50 with water) into a large’ish pan and  bring the mixture to a boil, then simmer for 15/20 minutes to let the fruit absorb the liquid.  Give the mixture a stir from time to time so that nothing sticks to the pan bottom.

·         Whisk the eggs and glycerine together

·         Sift and stir the flour, baking powder and salt together in a large mixing bowl

·         When the fruit is nicely plumped up, pour the contents of the pan over the flour and stir vigorously until the batter has absorbed all the lovely gooey fruit and liquid.

·         Finally whilst still stirring vigorously, add the egg mixture.  It really is important to stir the eggs and batter together quickly.  If not the egg will cook before it mixes in!

·         Finally pour the batter into the baking tin, sprinkle the top with a generous desert spoon of Demerara sugar and set it to cook on a lower middle shelf in the oven for about 60/70 minutes. 

·         Check in the usual way with a skewer after about an hour and make your own mind up about when to take the cake from the oven.

·         Set the cake aside, in its tin, for about 30 minutes then turn it out onto a rack to cool.  If you can resist, wait at least a day before eating.  The longer you can manage to keep the cake, within reason, the better it gets!  That’s what the glycerine is for.  It helps the baked cake to reabsorb atmospheric moisture and become lovely and sticky.
 
HINT!
Us Yorkshire folk allus eyts a big cob o' Wensli'dale cheyse wi us frewt cake.  Meks it teyst reyt gradeley!
We allus calls it cut n'd cum agin cake, cos its cheyp ter mek and fer ter gi away, yer can cum again and eyt sum more.  Not tew regler tho!
Translation supplied on demand
 

Wednesday, April 2, 2014

Marzipan. Love it or Hate it - no in betweens, I think

Marzipan

What is it?

Fundamentally it is a sweetmeat that consists of sugar, egg, a little liquor, almond essence and ground almonds.

Where did it originate?

One possible geographic origin for Marzipan is in Spain, then known as Al-Andalus. In Toledo (850-900, though more probably 1150 during the reign of Alfonso VII) this specialty was known as Postre Regio instead of Mazapán) and there are also mentions in The Book of One Thousand and One Nights of an almond paste eaten during Ramadan and as an aphrodisiac.  Mazapán is Toledo's most famous dessert, often created for Christmas, and has PGI status.  Almonds have to be at least 50% of the total weight, following the directives of Mazapán de Toledo regulator counseil.

The above has been copied from Wikipaedia.

The following recipe largely follows that of Delia Smith who I credit with the source recipe.  I have made my own slight changes.


Marzipan – Almond Icing

Ingredients

90gm Icing sugar, plus a little extra for dusting the mixture
90gm soft golden brown sugar
225gm Ground almonds
1 egg, beaten

6 drops pure almond essence

1 dessert spoonful Amoretto liqueur or other liquor of your choice

Method
Sift the icing sugar and caster sugar together into a large bowl, then, stir in the lightly beaten egg. Place the bowl over a pan of simmering water and whisk continuously for about 10 minutes, until the mixture is thick and fluffy.

Remove the bowl from the heat and sit the base in about 5cm of cold water. Whisk in the almond extract and brandy and continue to whisk until the mixture is cool.

Next, stir in the ground almonds and knead the mixture to form a firm paste on a surface lightly dusted with icing sugar.

Finally roll out the quantity you need on a clean cold surface dusted with icing sugar.


I have found that prepared marzipan can be kept in the fridge for at least a week, maybe more 
 

Simnel Cake – Fact or fiction? A charming story and a delicious cake.

Shrewsbury Simnel Cake

It’s been quite some time now since I’ve been inspired to write something about food.  Maybe because since New Year 2014 I’ve been watching my weight – well I’ve always watched my weight, but usually I watched it creep up!  Just after the New Year I decided that enough was enough so I stopped drinking alcohol and cut out all kinds of useless calories and it’s working.  Someone asked me yesterday where my overweight twin had got to; he hadn’t been around for a while.  Now, that did do my ego and resolve a power of good!  However yesterday I slipped, more anon.

I remember that my mum used to make a special cake for Easter, called a “Simnel Cake,” so I looked it up on the ‘tin brain’ to find out more about it.  Simnel cakes, it seems, have a long and interesting history and not a little mythology attached.  The main thread is that they were made by servant girls in grand houses, as gifts for their mothers at Easter and usually given on the girls’ first day off after the hiring fair.  I imagine that they were given the leftovers from the “Big House” pantry when the family decided that they would move back to the country in the spring after wintering in London; or when they just got fed up of eating rich winter food.  Whatever, the main ingredients are sugar, spices, dried fruit, marzipan and a key ingredient, in medieval times, was white flour - a great luxury.


Now to my sin – having made some Simnel cakes, I made the version known as the Shrewsbury Simnel cake named after the city where it was first said to have been made, intending them to be Easter gifts for friends.  However, when I was invited to a birthday party at short notice and didn’t have a gift, hey ho, out came a Simnel cake in all its glory.  The lady in question couldn’t resist cutting it and sharing it with her guests and I couldn’t resist a slice – it was truly delicious and much appreciated.  So lovely people, here is the recipe.  I hope you enjoy making one or several, they do make great gifts and friends really appreciate the time and love that goes into a homemade gift, I can assure you.

Recipe

Ingredients

·         250g unsalted butter

·         175g plain white flour

·         4 eggs

·         200g soft brown sugar

·         100g ground almonds

·         2 heaped teaspoons allspice

·         1 heaped teaspoon ground cinnamon

·         1 heaped teaspoon ground nutmeg

·         1 level teaspoon ground cloves

·         150g golden sultanas (or more or less to suit your taste)

·         150g glace cherries (or more or less to suit your taste)

·         1 level teaspoon and a pinch baking powder

·         1 dessert spoon vanilla essence

·         1 dessert spoon glycerine

·         500g homemade marzipan (for the recipe see below)

Method
Preparation
Set the oven to 150 C
Prepare a 21cm loose based, spring sided baking tin by buttering it lightly, then prepare to line it with a double fold of baking parchment.  When you’ve made your double fold,  make another about 2cm up from the initial fold and snip linked “V” shaped serrations into it at the bottom (folded side) to enable it to fit easily to the sides of the baking tin.  Butter it on the inside side and fit it into the tin, with the “V” shapes at the base.  Cut a rough circle from the leftover butter paper and put it design side down into the base of the tin to secure the side lining.  Next, using the loose base of the tin as a template cut a double layer of baking parchment so that it fits snugly to the inside base of the tin.  Fit the base, butter the cut out circle and place it butter side down on the base making sure to cover the whole base including the “V” shaped cut outs.   I hate this bit, I’m glad it’s over!  In fact you can keep these “cartouches” as they’re called for another time, I do.  When you remove them from the cooked cake do it carefully, they ‘kind of mature.’  At least that’s my excuse.

Make the cake batter.
First scald the sultanas in a jug with enough boiling water to cover them, for about 30 minutes.
Beat the eggs with an electric whisk in a bowl

Soften the butter and beat in the soft brown sugar, until the mixture is well blended and light.  Add the beaten eggs a little at a time until the mixture is lovely and sloppy!  Beat in the spices, vanilla essence, glycerine, baking powder and finally the flour in maybe four portions, beating the mix to a smooth consistency between each addition.  Finally add the ground almonds and beat them in gently, by now the batter will be quite stiff, don’t overheat your beater!  Drain the sultanas and add them to the mix followed by the cherries. Now making sure they’re super clean, get your hands in, I love it!  Stir the batter by hand until you have the fruit evenly distributed through the batter.  We’re almost there – but now scrape your hands clean and wash them well, because its time to add the finishing touch, the marzipan that you have made earlier.

Roll out enough marzipan to make a circle at least 2cm thick, to fit maybe half a centimetre shy of the inside of the cake tin. Set it to one side.
Load approximately a half of the cake batter into the baking tin, making sure that it is level, next place the circle of marzipan on top.  Load the remaining batter on top of the marzipan; make a small depression in the centre of the batter so that when the cake rises during cooking, the baked cake has a level top, rather than a dome. 

Cook
Make a tinfoil ‘hat’ and fit it to the top of the parchment cartouche, we don’t want a burned finish after all this work. Put the cake tin on a lower middle shelf of the oven and bake the cake for two to two and a half hours at 150 C, check with a skewer in the usual way to check that the cake is properly cooked.  A tip – I like to put a big dish of water in the bottom of the oven when cakes are cooking, I tend to think it keeps them moist.

When the cake is cooked, remove it from the oven and allow it to cool in the tin for ten minutes or so before springing the sides.  Then, after putting the tinfoil hat on the worktop, invert the cake tin over it and lifting the sides of the tin first, take the cake carefully from the tin and recover the parchment cartouches.  The base of the tin will probably still be sticking to the bottom of the cake, remove it carefully.  Allow the cake to cool in this position overnight.
The reason for inverting the cake is to ensure a flat top for later decoration.
Decoration
This being an Easter cake, there is a strong Christian tradition attaching to how it is presented but you don’t have to be Christian to enjoy the result!  However, this is how it happened in “olden times.”

Roll out a circle of marzipan about 1cm thick, sufficient to overlap the top of the cake a little.  Warm a couple of dessert spoons full of apricot jam and spread it over the top of the cake.  Put the circle of marzipan on to the ‘jammy’ cake top, trim to a neat finish and pinch the edges as though you were sealing the top of a pie.   We’re almost done.  Now for the Christian bit!  Omit this part according to your views – but of course, you get less marzipan!

Make eleven balls from the remaining marzipan and fix them evenly around the circumference of the cake with a dab of jam.  So what’s Christian about that I hear you ask?  They are said to represent eleven of the twelve apostles, Judas having been dismissed for bad behaviour!  Isn’t folklore wonderful!

Lastly set the grill to ‘full,’ put the cake under and toast the marzipan topping and very, very carefully until it is just lightly browned.

To go the full “Monte” you can wrap yellow ribbon around the sides of the cake, tied off in a bow as you bring it to the table – but that really is showing off.

Voila, Done!

If you’ve got this far, thanks for reading the latest blog from Carl’s Crafty Kitchen!


Tuesday, March 11, 2014

Absolute Indulgence! Strawberries and Cream with a difference


Strawberry Meringue Gateau
I had a special request the other day from one of my dinner guests.  Could he have some proper custard with his steamed sticky toffee pudding, please, instead of salty caramel sauce?  Not a problem and best of all, my pal Ronnie, he of the Ecological Farm – Can Musson de Buen Honor, look it up on the www, its just an amazing enterprise, had given me a box of eggs straight from the chicken coop!  So – one delighted, custard connoisseur guest.
Ha, fooled you though, this recipe isn’t about making custard; I’ll do that another day.  Its on my usual theme, what to do with leftovers, in this case five amazing egg whites?  By the way the custard was mind blowing.
There was another stroke of luck at the market today too.  Big 2 kg boxes of Spanish strawberries for €4.98!  They’re big, almost certainly glasshouse grown and a bit under-ripe.  That isn’t a problem though, we’re not at Wimbledon.  That can be fixed, its easy.
So today’s crafty recipe is for meringues, of course, what else?  But not just ordinary meringues, Strawberry Meringue Gateau is my theme for today.
 
 
Sheer Indulgence
 
OK here we go, this is what we do.
First set the oven to 100 C and prepare two 21 cm flan tins by cutting circles of baking parchment to cover the base of each tin. Lightly grease their bases and sides with sunflower oil to prevent the finished meringues from sticking to the sides, then put the “cartouches” in (parchment circles to you and me!) and push then firmly into contact with the base of the tins.
Ingredients
Meringue
5 Eggs whites at room temperature
120 gm Caster Sugar
120 gm Icing sugar
Sunflower oil, a touch
Filling
500 gm strawberries
A small glug or two of Cointreau
1 tablespoon caster sugar
Cream
150 gm Mascarpone
250 ml whipping cream
50gm Icing sugar
Method
Meringue
In a clean glass or stainless steel (not plastic) bowl beat the egg whites with an electric whisk – on medium speed, until the mixture stands up in stiff peaks.
Add the caster sugar slowly to the egg white foam, a tablespoonful at a time whilst whisking on high speed, until the sugar is all used and mixture takes on a glossy sheen, then stop.
Lastly fold in the icing sugar one dessert spoon at a time, using a ‘figure of eight’ movement and taking care not to knock the air from the sugary foam.  If you try to cheat and beat it in with the electric whisk you will fail.  I’ve tried it and the end result resembles a sugary doorstep on which you could easily break your teeth!
After all the icing sugar has been thoroughly mixed in, put dollops of the mixture carefully and equally into the flan tins.  Smooth the tops, you’ll only be able to make them look ‘swirly’ because by now the mixture is quite gooey – try not to get splodges on the sides of the tins, they can get charred in the oven, make it difficult to extract the finished meringue from the tin and give it a burned taint.
Put the loaded tins on a lower mid shelf in the oven, set the timer for 90 minutes.  When timer pings, reduce the temperature to 80 C and reset the timer for another 60 minutes and wait.  What is happening here is that we are not cooking the meringues in a conventional sense; we are simply drying the egg/sugar mixture – Simples!
It is easy to tell if the meringues are ready, press VERY lightly on the top – if there is no “give” they’re done.  If you still feel a little movement, let them dry as the oven cools down, go to bed, have a stiff drink or take the dog for a walk until they finish.
When the meringues are lovely and crisp, take them from the oven and leave them aside to cool in the tins for half an hour or so.  You should see them break away slightly from the edges of the tins as they cool down.  Now for the tricky bit, getting the finished product out!  Try not to smash the meringue discs or you’ll have to revise your dessert offering to “Eton Mess.” Start by gently flexing the sides of the tin and then deflecting the base a little to free up the meringue – all being well it’s time to remove them.  Put a clean flat board over the top of the tin; flip the tin over and Voila!  The meringue plops on to the board – we hope!  Repeat!  We now have the job more or less licked, excuse the pun.
Let the meringues cool thoroughly to room temperature before starting to assemble the gateau.  If you don’t, your whipped cream will melt as you load the gateau and the cat will be all over the kitchen worktop having a birthday with the dripping cream!  At this stage meringue can be stored, either in the fridge or even the freezer.  Just make sure this you seal it well in an airtight plastic bag or it will go soggy.  It will anyway later, but at this stage you’ll want to present it looking pristine.
Filling and sauce (Coulis)
Wash and ‘hull’ the strawberries, drain them well and put them in a pan with a glug or so of Cointreau.
Shake the caster sugar over them.
Heat the pan until the juice from the strawberries, Cointreau and sugar melt together, don’t let the mixture boil, the fruit should still be firm’ish when you load the gateau.  Cover the pan with a lid and set aside to cool.
When the fruit is cold, drain and reserve the juice and a tablespoonful of fruit.
Reduce the juice/and reserved strawberries over a high heat, stirring constantly until it has a jam like feel.   Remove it from the heat immediately and blend it to a coulis with a high speed, hand held, electric blender.  Set it aside in a clean jug or bowl.
Cream
Put 250ml of 35% whipping cream into a clean, cold bowl.
Add the icing sugar and beat together with an electric mixer until the cream begins to thicken
Add the mascarpone to the mixture and continue to whip the cheese/cream mixture until it becomes firm.
Assemble the gateau
Put one round of meringue on to a clean circular board, ‘swirly’ side up if it is still attached; leave the cartouche on the base layer of meringue.  It helps when you cut and serve a slice.
 
Loading the filling
 
Load the top of the meringue with two thirds of the whipped cream, making a slight hollow in the centre and leaving perhaps 3cm free at the edge (‘coz you’re going to press down on the top layer soon and we don’t want it oozing out!)  Add the strawberries into the hollowed out cream “nest.”  Next, make sure that the cartouche is NOT attached to this, the second layer of meringue!  Then ‘butter’ the underside with most of the remaining cream, place it on top of the loaded base meringue/strawberry/cream  layer and gently press the layers together, saving just a little for decoration on the top.
Finally put about eight teaspoonful's of the remaining cream, evenly around the circumference of the top meringue, put a strawberry on top of each blob of cream.  Then relax, you’ve done it!!!  Get ready for the applause from your guests and avoid the bathroom scales for at least three weeks
If you wish, the gateau can be frozen at this stage, for no more than a week, do it straight away if you’re not planning to serve it same day, then the juices will not have time to soak into the meringue and make it soggy.  In fact I like to freeze mine anyway; it is easier to cut whilst it is frozen or semi-frozen.  Cut it first and de-frost for an hour before serving.
Serve with just a little of the coulis “napped” (drizzled in plain English) on top of each slice and on the plate.
!